
For use with Home Assistant Yellow – The Hard Way – macOS/Linux Edition
Video Guide:
Table of Contents
- Preface
- Pre-Requisites
- Preparing the I/O Board
- Installing Software Dependencies
- Downloading the Raspberry Pi Foundation’s usbboot tool
- Building the usbboot tool
- mounting the eMMC Storage
- Flashing an OS onto the eMMC
- Summary
Preface
When you buy a Raspberry Pi Compute Module 4, with eMMC storage there’s no Operating System on the board at all, and being that the eMMC is soldered to the board, it’s not like we can easily take it out and flash an image to it like we can with the micro-SD cards from a Regular Raspberry Pi.
There’s a number of steps and pre-requisites to prepare a CM4 for booting. This process works for installing ANY image on the CM4, not just for Home Assistant.
Software Pre-Requisites
- Xcode Command Line Tools installed on your Mac (Mac Only)
- run
xcode-select --installfrom your Terminal
- run
- HomeBrew installed on your macOS Device (Mac Only)
Hardware Pre-Requisites
- Raspberry Pi Compute Module 4 (obviously)
- Raspberry Pi CM4 I/O Board (Amazon Affiliate Link)
- 1 x Pin Jumper (Amazon Affiliate Link – Pack 200)
- Micro-USB Cable
- Power Supply (one of the following)
- Raspberry Pi PoE+ Hat (Amazon Affiliate Link)
- 12 V AC Power Adapter with 2.1mm Barrel plug (Amazon Affiliate Link)
Preparing the I/O Board
There’s a few steps to prepare the I/O Board before we can flash an OS onto the eMMC storage.
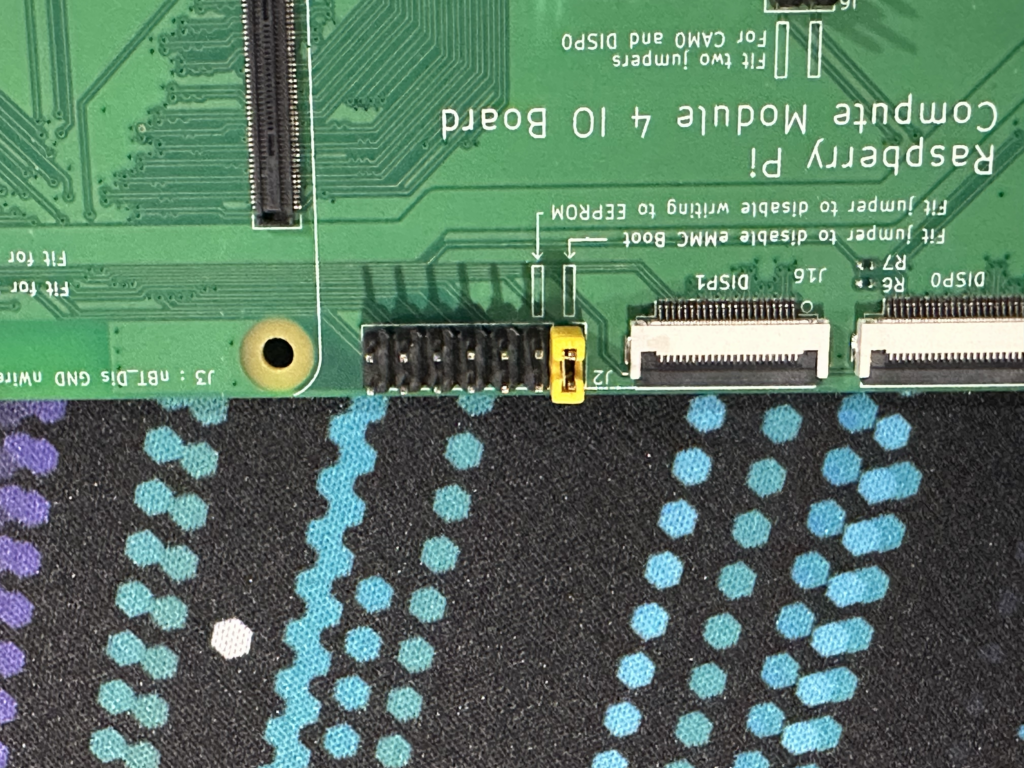
Install a pin Jumper in the first position on J2 to prevent booting from eMMC. This jumper allows you to mount and flash the eMMC storage just like a regular SD Card
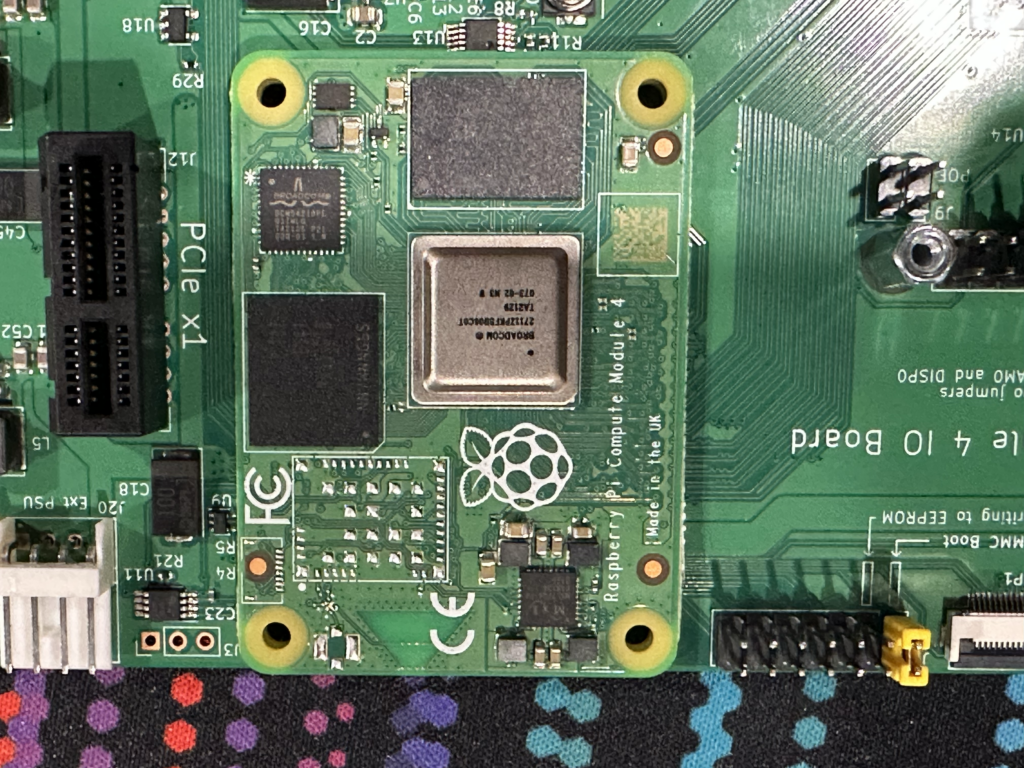
Install the Raspberry Pi CM4 into the I/O Board
The CM4 takes a bit more pressure to click into place than you expect, to the point of being slightly concerning, but once it’s installed, it’s challenging to get out of the socket.
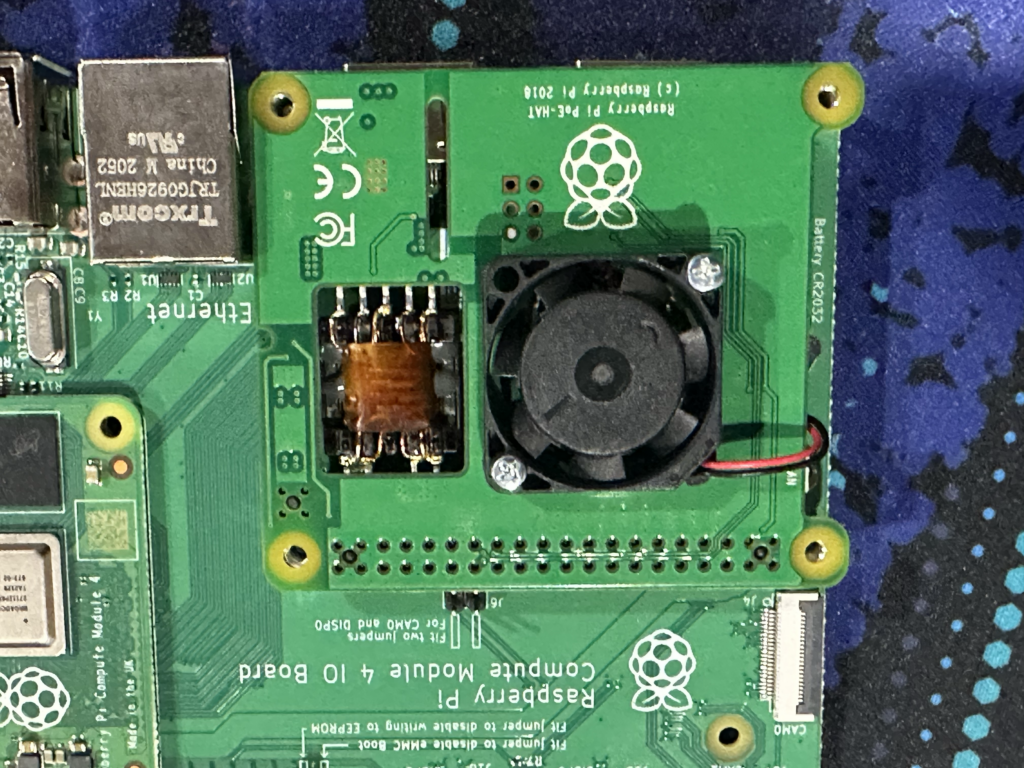
Optional
If making use of a Raspberry Pi PoE+ hat for powering the I/O board, install it onto the I/O Board. The PoE+ hat comes with stand-offs and screws to fix it into place.
Installing some Software dependencies
We need to install some Software dependencies before we can mount the eMMC storage. We’ll be using the Raspberry Pi Foundation’s usbboot tool
To do this, on macOS you’ll need to have homebrew and git command line tools installed per the Software Pre-Requisites above
libusb
libusb is essentially a USB “driver” that will allow us to mount the eMMC storage.
To install libusb, provided you’ve got Homebrew installed on your Mac, simply run:
brew install libusbif you’re on Linux, use your regular package manager, like apt.
Example:
sudo apt install git libusb-1.0-0-dev pkg-configpkg-config
Another dependency for the usb-boot tool from the Raspberry Pi Foundation is pkg-config
Like with libusb, it’s fairly simple to install”
brew install pkg-configagain for Linux, use your regular package manager
Downloading the Raspberry Pi foundation usbboot tool.
In order to mount the eMMC storage, we’ll need to download and build the Raspberry Pi Foundation’s usbboot tool.
from your command line, change into a working directory, and then run
git clone --depth=1 https://github.com/raspberrypi/usbbootOnce that’s completed cloning cd into the usbboot directory:
cd usbbootBuilding the usbboot tool
Now we need to build the usbboot tool
The Raspberry Pi Foundation have made this really simple with a Makefile
Simply run:
makeAfter about a minute, the build will be completed, and you’ll notice some new files in the folder.
Mounting the eMMC Storage
To mount the eMMC Storage, we need to plug in the microSD cable to the I/O board, power up the I/O board, and then we need to run the usbboot tool
./rpibootand after a moment, the eMMC Storage will be mounted, and available for flashing.
Flashing the OS onto the Storage
The rest of the flashing process is the same as a regular SD card.
Using Raspberry Pi Imager, or your favourite card flashing utility, simply select the “RPi-MSD-001” storage option and then write the image to the storage.
Summary
As you can see, there’s a few steps to preparing a CM4 for imaging. If you’re not comfortable using the Command Line, then this is probably not the process for you.
There’s a MUCH easier way to get Home Assistant installed onto a CM4 to use with Home Assistant Yellow.
That said, this process works with ANY Raspberry Pi Image, not just Home Assistant, so it has the added advantage of being more universally functional.